Two Adirondack chairs butt up against a wooden deck railing, ready to enjoy the fall weather.

Can You Build a Deck in the Fall?

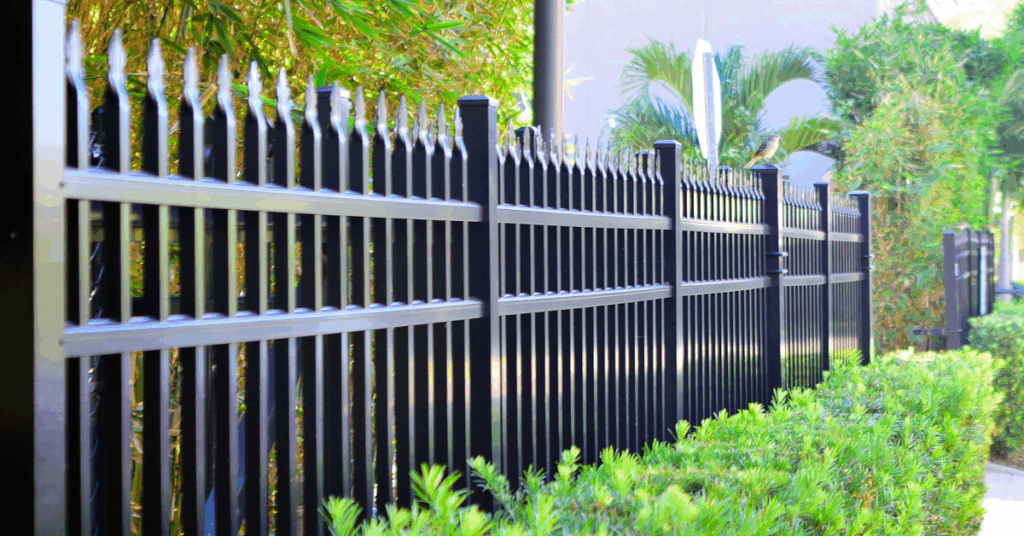
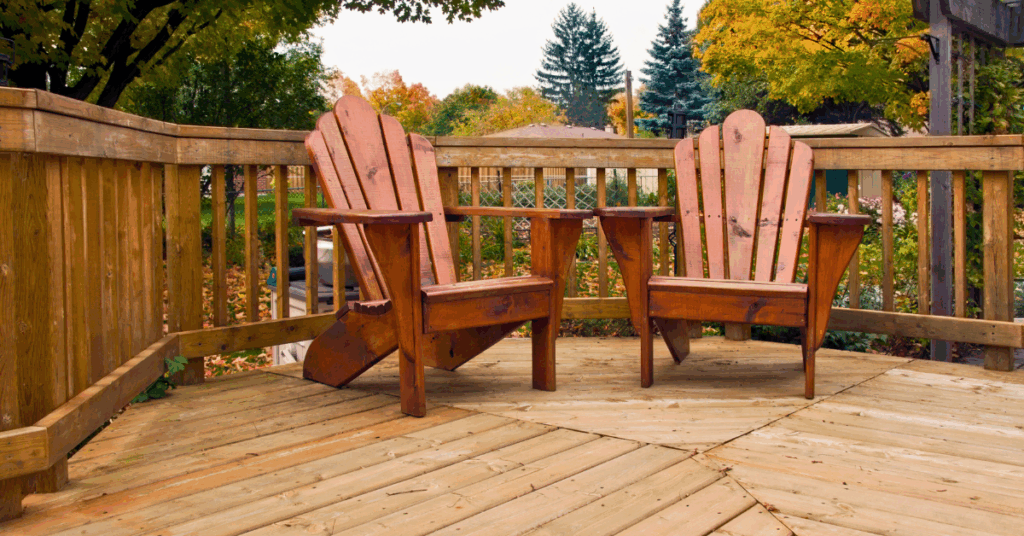
Not only can you build a deck in the fall, you probably should build a deck in the fall. Why? For starters, fall brings with it not just cooler, drier weather but also increased contractor availability and potential savings on materials. There are even more good reasons why fall is perhaps the best time to build a deck. Read on to learn them all. 1. Weather Conditions One of the most practical reasons to consider a fall deck project is the weather. By September and October, the sweltering heat of summer begins to fade, making outdoor work far more comfortable for both contractors and homeowners who want to stay involved in the process. Cooler temperatures are also easier on building materials.  Extreme heat can sometimes cause wood to expand, warp, or dry too quickly during a deck installation. Fall’s milder conditions reduce these risks, leading to a more stable finished product. Additionally, the lower humidity levels often seen in autumn create an ideal environment for treating and sealing wood. This can result in better absorption and longer-lasting protection, ensuring your deck weathers the elements for years to come. 2. Contractor Availability Another advantage of fall deck building is ease of scheduling. Spring and summer are the busiest seasons for most contractors, with homeowners rushing to get projects completed before peak outdoor entertaining months.  By contrast, fall tends to be a slower time of year. This seasonal lull means you’re more likely to secure the contractor you want without the long wait. It may also result in quicker turnaround times, as crews can devote more consistent attention to your deck installation project, instead of juggling multiple jobs. For homeowners, it can all translate into a smoother, less stressful experience. 3. Material Considerations And fall doesn’t just benefit you when it comes to contractors and scheduling; it can also work in your favor when it comes to materials. Lumber and composite decking products respond much better to the cooler, drier air autumn in the Northeast and Mid-Atlantic is known for, as it minimizes warping and moisture-related issues during installation.  Additionally, autumn is often when suppliers are looking to clear out inventory before the end of the year. This can mean seasonal discounts or special pricing on decking materials, railings, and accessories. If you’re looking for a way to stretch your budget without sacrificing quality, fall could be the perfect time to build a deck. 4. Timing & Future Use Another great reason fall is the best time to build a deck is that it sets you up for success in the seasons to come. Instead of waiting until spring to start a project, potentially missing out on weeks of warm-weather enjoyment, if you build a deck in autumn you’ll already have a finished deck in place when the first sunny days arrive. This approach also means less disruption to your outdoor summer plans, i.e., instead of dealing with sawdust, tools, and construction noise in June or July, you’ll be free to host barbecues, family gatherings, or quiet evenings outside on your brand-new deck. 5. Potential Challenges Of course, fall deck building isn’t without its challenges, and we’d be remiss if we didn’t mention them here. Shorter days mean fewer daylight hours for crews to work, which can extend the timeline, at least slightly. Depending on exactly where you are in the Northeast or Mid-Atlantic, weather can also be a factor. To wit, sometimes heavy rain, early snow, or strong winds can cause short delays. All that being said, a skilled contractor will anticipate these challenges and plan accordingly. With good scheduling and clear communication, most fall projects move forward smoothly despite the occasional hiccup. Get a Jump on Next Summer Spring and summer are the traditional deck-building seasons. It’s true. But why be hemmed in by tradition when you can break the rules and take advantage of all the deck-building benefits fall has to offer? Cooler weather. Easier contractor scheduling. Potential cost savings. And the advantage of having your deck ready for lounging and entertaining next spring and summer, well ahead of when the weather turns nice. With the right preparation and an experienced contractor, fall could be the perfect season to bring your vision to life. And Ladiesburg Lumber could be the perfect company to help. If you’re thinking of building a deck now, give us a call or drop us a line today.

Read More
A painted black aluminum fence stretching down a sidewalk with hedges on the perimeter.

A Complete Guide to Aluminum Ornamental Fencing

Aluminum has been around for a long time, and has been put to much productive use. It’s light and it’s strong, making it an ideal material for applications that need both attributes in equal measure, like aircraft. But it would be a mistake to not consider the versatile metal in applications where beauty is also required, which brings us to aluminum ornamental fencing. An aluminum ornamental fence is, more and more, becoming the go-to choice for homeowners and business owners alike, as it combines the beauty of traditional wrought iron with the strength and longevity of modern materials. Such fencing offers a sophisticated look without the extensive amount of upkeep. Whether you’re aiming to add curb appeal to your home, enhance the security of your commercial property, or create a defined boundary without obstructing views, an aluminum ornamental fence can deliver. Benefits of an Aluminum Ornamental Fence Durability and Rust Resistance Unlike iron or steel, aluminum won’t rust or corrode, making it ideal for areas with varying weather conditions. It’s designed to withstand rain, snow, humidity, and sun exposure without weakening over time (which makes it great for both aircraft and for fences). Low Maintenance Requirements Once installed, aluminum fencing needs minimal care, i.e., no annual painting, sealing, or intensive upkeep. Occasional cleaning with soap and water is typically enough to keep it looking sharp year-round. Elegant Appearance and Design Versatility An aluminum ornamental fence offers the timeless charm of wrought iron while allowing for modern design flexibility. It can complement anything from a historic home to a sleek commercial building, all without compromising strength. Aluminum Fence Styles & Design Options Panel Styles Concord: Panel Heights: 36″, 42″, and 48″ Specialty Heights Available Upon Request Bottom Type: Flush Bottom Colors: Black, Bronze, and White Lexington: Panel Heights: 36″, 42″, 48″, 54″, 60″, and 72″ Specialty Heights Available Upon Request Bottom Type: Flush Bottom or Picket Through Colors: Black, Bronze, and White Charleston: Panel Heights: 36″, 42″, 48″, 54″, 60″, and 72″ Specialty Heights Available Upon Request Bottom Type: Flush Bottom or Picket Through Colors: Black, Bronze, and White Saratoga: Panel Heights: 36″, 42″, 48″, 54″, 60″, and 72″ Specialty Heights Available Upon Request* Bottom Type: Flush Bottom or Picket Through Colors: Black, Bronze, and White Available Top Options: Straight, Scalloped, and Arched Trenton: Panel Heights: 36″, 42″, 48″, 54″, 60″, and 72″ Specialty Heights Available Upon Request Bottom Type: Flush Bottom or Picket Through Colors: Black, Bronze, and White Installation Considerations DIY vs. Professional Installation If you have the tools and skills, aluminum fencing can be a manageable DIY project. However, professional installation ensures precision, long-lasting stability, and a flawless finish. Preparing the Site Clear debris, check property lines, and ensure the ground is level before starting. Accurate measuring is crucial to avoid gaps or issues with alignment. Common Installation Challenges Uneven terrain, rocky soil, or property line disputes can complicate the installation process. Professionals can easily navigate these issues with specialized equipment and experience. Cost Factors Material Quality and Style Thicker, higher-grade aluminum will cost more but provides added durability. Decorative features and custom finishes can also affect the price. Labor Costs Professional installation costs from, say, an aluminum fence supply company, varies based on fence length, terrain complexity, and design intricacy. Long-Term Value While aluminum ornamental fencing can have a higher upfront cost than wood or chain link, its longevity and low maintenance make it a cost-effective choice over time. Maintenance Tips Cleaning and Upkeep Wash your beautiful new aluminum ornamental fence with a mild soap-and-water solution every few months to remove dirt, pollen, and debris. Spot Repairs and Touch-Ups For small scratches or chips, touch-up paint can prevent corrosion and maintain appearance. Protection Against Environmental Wear Trim plants and shrubs near the fence to avoid trapping moisture around your fence, and inspect periodically for signs of damage after storms. The Best of All Worlds Aluminum ornamental fencing offers a unique blend of elegance, strength, and practicality. It resists rust, requires minimal upkeep, and can be customized to match your property’s unique style. And we’d be remiss if we didn’t mention, somewhere in this blog, our favorite aluminum fence brand: Patriot Aluminum, which does all of the above better than the rest at a price you can afford. But whether you’re upgrading your home’s curb appeal or securing a business, an aluminum ornamental fence of any make delivers long-term value and timeless beauty. And if you’re looking for a company to professionally install your aluminum ornamental fence, look no further than Ladiesburg Lumber Supply: the area’s top aluminum fence supply company. For a complimentary quote on your next fence, get in touch with us today.

Read More
A backyard patio/deck constructed of dark lumber.

Deck Maintenance Steps to Take If Your Deck Has Sun Damage

Human beings have learned, all too often the hard way, that too much exposure to the sun’s rays can cause great harm. As such, we try to limit our time spent in direct sunlight. But your deck can’t do that. It’s required to stand and endure the harsh UV rays of the sun day in and day out, across all four seasons. And in the same way that exposure to the sun’s rays can take a toll on you, it can also take a toll on your deck. Sun damage causes fading, cracking and dry, brittle boards that compromise both the appearance and safety of your deck. Addressing these issues sooner rather than later not only preserves your deck’s beauty but also protects your investment. Following are five essential deck maintenance steps to restore your sun-damaged deck as well as prevent future problems. 1. Inspect the Extent of the Damage Start with a visual inspection of your deck. Look specifically for things like: Fading A dull, grayish color is a clear sign of UV damage. Dry, brittle wood This indicates the wood is losing its protective oils. Cracking or splintering Another effect of the drying rays of the sun, this can pose a safety hazard. Warped or weakened boards These may need to be replaced entirely to ensure structural integrity. Loose fasteners If the boards warp enough the fasteners holding your deck together may come loose or disengage entirely. Note: If you find significant warping and/or damaged fasteners in your deck maintenance inspection, repairs may be necessary before moving forward with the next steps. 2. Clean the Deck Thoroughly Before attempting any restoration of your deck, you’ll need a clean surface. Use a well-regarded wood deck cleaner to remove any dirt, debris or mildew—all of which can further damage the wood and/or interfere with any protective stain or sealant (more on that below). For tough buildup, consider using a power washer, but be careful to: Use the correct pressure setting (usually 500–1200 PSI for wood). Keep the nozzle moving to avoid gouging the surface. 3. Sand and Repair Damaged Areas Once you’ve used the above-referenced wood deck cleaner to clean the deck, and you’ve made sure the deck is fully dry, lightly sand any faded or rough spots to restore smoothness and prepare the wood for staining. Again, if you find boards that are too warped, cracked or rotted to fix, replace them before continuing any further. Taking the time to repair problem areas now will prevent bigger problems later. (This last item is really Wood Deck Maintenance 101, but you’d be surprised how many people don’t do it). 4. Apply Protective Stain or Sealant There are two remaining steps in your current deck maintenance endeavor. After sanding and cleaning your deck, it’s time to not only restore its natural beauty but also shield it from future UV damage. By choosing a UV-resistant stain or sealant for your deck, you’ll protect it not just against the sun’s rays but from moisture, as well. Be sure to: Follow the manufacturer’s instructions for application. Apply the stain or sealant evenly and allow proper drying time. This critical step not only revitalizes your deck’s color; it also adds a protective barrier against future damage.  5. Tips to Protect Your Deck From Future Sun Damage An ounce of prevention is worth a pound of cure, an aphorism that certainly applies here. You can keep your deck looking its best by following these simple, preventative tips: Clean and reseal your wood deck every one to two years. Always use UV-blocking stains or sealers, as these offer added protection. Add shade-solutions—like pergolas, umbrellas, or sun sails—which reduce your deck’s direct exposure to the sun’s rays. Finally, be sure to rotate your outdoor furniture; this prevents uneven fading. Why Learn Things the Hard Way? Sun damage can age your deck quickly, but with the right care you can restore its beauty and keep it going strong for years. Of course, wood deck maintenance doesn’t stop after one restoration; it takes the kind of regular maintenance outlined above, along with preventive measures like UV-resistant products and shade-solutions, to make a long-term difference in the lifespan of your deck. Unsure where to start? Need expert advice on deck maintenance? At Ladiesburg Lumber, whether it’s decking-expertise or decking materials, we can point you in the right direction. Stop by our store or visit us online today.

Read More
A wet deck close up, you can see the reflection of the railing the water.

The Best Methods for Deck Waterproofing

Spring is on its way, folks, and while that means warmer weather on the road ahead, it also means wetter days. That means plants will thrive, but your deck? Not so much … unless you’ve taken steps to protect against the wet season. When you apply proper deck waterproofing, you’re ensuring your deck is able to withstand these weather conditions and serve you well for years to come. There are plenty of ways to reach that goal—sealants and stains, waterproof membranes, epoxy, and more. In this blog, we’ll tell you everything you need to know about these methods so you can make an informed decision on how to achieve a truly waterproof deck. Sealants and Stains Sealants and stains are possibly the most popular deck waterproofing options out there, and for good reason. They create a reliable protective layer—assuming you use quality products—that repels moisture and laughs in the face of otherwise harmful UV rays. Sealants don’t just protect the surface of your deck, either. They penetrate the wood, which prevents unwanted water from seeping in and causing interior rot. This contributes to both the health of the wood and its overall beauty—all while protecting your deck from ultraviolet light. Though these sealants and stains require reapplication every few years, it’s hardly a headache. Application is simple and straightforward! So, to recap, the benefits of sealants and stains are: Easy application and cost-effectiveness Enhancement of natural beauty of the wood Protection against moisture and sun damage Just be aware of a few potential drawbacks: Must be reapplied every few years Less effective in particularly humid or rainy climates Waterproof Membranes Want your deck to double as a roof for a space you have beneath it? There’s an option for such cases that provides superior protection compared to traditional sealants. Using materials like rubberized coating, vinyl, and PVC, waterproof membranes are applied over the surface of the deck before the decking boards are installed. With this method properly applied, water won’t have a chance of reaching the deck structure, meaning its lifespan is maximized and the space under the deck will stay nice and dry! Under-Deck Drainage Systems If you’re looking for an under deck waterproofing solution outside of a waterproof membrane, a drainage system will provide what you’re looking for. These systems are designed to divert water away from your deck structure in order to keep the area below dry and usable. Installed beneath the deck boards, they channel water away from vulnerable areas using a system of gutters. Like the aforementioned membrane, this is a great method for keeping water out of living spaces that are under a raised deck. Liquid Coating and Epoxy Systems Some homeowners desire deck waterproofing that offers a seamless protective barrier and enhanced durability. For such a case, liquid waterproof coatings are up to the task. Applied directly onto the surface of the deck, they form a sturdy waterproof layer that’s perfect for concrete, composite, and wood decks. Here are the key advantages: Seamless waterproof barrier Resistant to harsh weather, wear, and chemicals Applicable with a wide variety of deck materials Like any decking solution, there are a few things to keep in mind, though: Some coatings can become slippery when wet, presenting a potential safety hazard. We recommend a non-slip finish for such circumstances. Liquid coating and epoxy systems might require resealing on occasion to maintain maximum effectiveness. Vinyl and Composite Decking For those of you on the lookout for a waterproof deck that offers low maintenance and water-resistant features, we’ve got the perfect solution. Vinyl and composite decking are naturally resistant to moisture, insect damage, and rot. On top of that, they come in a plethora of colors and textures that emulate real wood; get the look without the frequent maintenance requirements! Though vinyl and composite decking have a higher up-front cost, the investment will be well worth it with the passage of time. This is thanks to their minimal upkeep and general longer lifespan. In short, the investment is one you’ll be happy with for years to come. Choose the Deck Waterproofing That Works for You! Choosing the best deck waterproofing method depends on several factors that largely boil down to your preferences. Do you want the authenticity of real wood or the low maintenance requirements of vinyl and composite decking? Or maybe you’re looking for an under deck waterproofing solution to keep your ground floor living space dry. Whatever your needs are, there are plenty of solutions available at Ladiesburg Lumber! Get in touch with us or visit our lumber yard for your first step towards a waterproof deck.

Read More
A split rail fence gate covered with snow and ice.

5 Types of Farm Gates and How to Install Them

Anyone who owns a farm understands the importance of fences and gates. It’s pretty tough to keep animals—and even crops—contained without them, after all. The gates ensure functionality, security, and even aesthetics. That said, you still need to choose the right ones. In this blog, we’ll explore the different varieties of farm gates and cover some tips for upkeep. Wooden Farm Gates These are a common choice thanks to their traditional rustic appeal. Typically found on smaller farms, they blend in with the natural surroundings quite well, adding charm and keeping things organized. Advantages Down-to-earth charm that enhances the ambiance of the farm Natural and renewable materials mean they’re eco-friendly Installation Tips Treat Against Weather and Pests: When you properly treat your wood, you’re providing it with protection against moisture, insects, and rot. This will help it last for years to come. Use Sturdy Hinges and Posts: Durable hinges and reinforced posts prevent sagging over time and require minimal maintenance. If you’re looking for sturdy fence gate hardware, visit our hardware store! Metal Tube Gates These offer lightweight materials and plenty of durability—the best of both worlds! Thanks to these qualities, they’re great for large farms as well as livestock management. And here’s another plus: They’re galvanized to resist rust. Advantages Rust resistance Durability Lightweight, making for easy installation Installation Tips Set Posts in Concrete: Concrete is like the super glue of construction, so placing your posts in it means they’re not going anywhere! Use Adjustable Hinges: You’ll thank us later. Without adjustable hinges, it’s difficult to accommodate uneven terrain and make sure everything is operating smoothly. Mesh Farm Gates These kinds of farm gates are designed to keep pests and small animals out, thanks to their small gaps. This makes them a highly versatile, cost-effective option for several different farming needs. Advantages Affordable Lightweight Versatile for various applications Installation Tips Stretch the Mesh Tightly: A poorly stretched fence may look fine at the time of installation, but it won’t be long before it begins to sag. Apply proper tension to ensure durability. Anchor the Mesh Firmly to Posts: Can’t stretch it adequately enough without help? Tensioning tools are a great way to install a mesh fence the right way. Electric Farm Gates These are the ideal choice for farms with high-security needs, as well as those with significant livestock management requirements. Adding convenience to functionality, they can be operated by remote control, saving time and energy that’s much better spent elsewhere on the farm. Advantages Remote operation for added convenience Prevents unauthorized individuals from gaining entry Provides effective livestock management Installation Tips Properly Ground the Gate: With this kind of voltage running through your fence and gates, it’s important to make sure you aren’t creating unnecessary hazards. Be sure to ground the electrical components. Install Warning Signs: You want to keep intruders away, but you don’t want anyone to get hurt. Installing warning signs around the perimeter—and making sure they get high visibility—will let wanderers and other curious individuals know they should turn back. Sliding or Rolling Gates Do you have an enclosure that requires a large opening? Sheep herding comes to mind, or maybe you need to fit heavy machinery into the enclosure. Whatever the reason, sliding or rolling gates are great for these wide entrances or even areas with limited swing space. They operate smoothly and provide plenty of space efficiency. Advantages Space saving thanks to a sliding mechanism that replaces the traditional swinging design. Smooth and efficient operation. Sliders and wheels help to ease the physical demands of a heavy gate. Installation Tips Level the Ground: For the tracks to work properly, the gate needs to have smooth, level ground to roll on. Use Quality Rollers and Tracks: Not all components are created equal, so be sure to invest in quality products that boast longevity and durability. Which Farm Gates Are Right for You? Choosing the right gate depends on several things. What type of farm are you running? What’s the desired functionality? What’s your available space? Whether you’re drawn to the rustic charm of wooden gates, the versatility and strength of metal tube gates, or the convenience offered by electric options, one thing is true across the board: Proper maintenance and quality gate hardware are key to its functionality. For complex gates—electric or sliding, for example—installation by a professional is recommended. This will ensure safety and functionality, and we can point you in the right direction! If you’re in need of fence gate hardware or lumber supplies, you’re already in the right place! Our lumber yard has what you’re looking for and our hardware store has a vast selection of gate hardware on hand. Get in touch or pay us a visit, and we’ll help you realize the vision you have for your farm!

Read More